Water damage and mold inspection

Water Damage and Mold Inspection
Mold can start growing within 24 to 48 hours after a leak, flood, or burst pipe—often in places you can’t see, like wall cavities, under flooring, or behind cabinets. If you’ve experienced any water event recently, understanding how water damage and mold inspection works is your first step toward protecting your property and your health.
A professional water damage and mold inspection is the fastest way to confirm whether mold is present, how far it has spread, and what needs to happen next. These inspections focus on both visible signs and hidden moisture to protect building materials and indoor air quality before small problems become expensive repairs.
Mold thrives in damp environments and can colonize porous materials within 24–72 hours
Hidden areas like wall cavities and subfloors often harbor the worst growth
Inspections map the full extent of moisture intrusion, not just what’s visible
Early detection prevents structural damage and reduces health risks
Understanding the Link Between Water Damage and Mold
When water damage occurs—whether from a dishwasher leak in March, an overflowing bathroom upstairs, or a June thunderstorm that breached your roof—it creates the perfect environment for mold to take hold. Excess moisture saturates drywall, wood framing, insulation, and flooring. If these materials stay wet beyond 24 to 48 hours, mold spores that are naturally present in every indoor environment will begin to germinate and spread.
The challenge is that mold growth often happens out of sight. Water travels through wall cavities, wicks up from floors, and pools in areas you never think to check. A thorough inspection identifies both the moisture source and any resulting fungal colonization, giving you the information you need to act quickly before the problem escalates.
Why Water Damage Greatly Increases Mold Risk
Mold spores are always present in indoor air—that’s unavoidable. What determines whether those spores become a mold problem is moisture. When materials like drywall, subfloors, and wood framing stay wet for more than 24 to 72 hours, they become the perfect breeding ground for active mold colonies.
Common water events—a washing machine hose burst in the laundry room, a slow refrigerator line leak behind the kitchen cabinets, or ice dam damage on the roof in February—keep building materials damp long enough for colonies to establish. Even if surfaces look dry on the outside, hidden moisture trapped inside materials or behind finishes can fuel ongoing mold grow without any visible signs.
Moisture control is the core strategy for preventing mold. Keeping indoor humidity below 50% (ideally between 30–50%) removes the conditions mold needs to thrive.
Mold requires moisture + organic material + time to grow
Porous materials like drywall and wood provide food sources
High humidity above 60% accelerates colonization
Even a small leak that persists for days creates significant risk
Common Sources of Water Damage That Lead to Mold
Burst supply lines during winter freezes, especially in exterior walls or unheated spaces
Roof leaks after summer storms, particularly around chimneys, skylights, and valleys
Basement seepage after heavy rainfall or snowmelt
Overflowing bathtubs, toilets, or sinks due to clogs or inattention
Appliance failures: dishwashers, water heaters, refrigerator ice makers, and washing machines
HVAC condensate line clogs that cause water to back up into air handlers or drip pans
Pin-hole pipe leaks behind kitchen or bathroom cabinets that go unnoticed for months
Recurring condensation on cold exterior walls during humid seasons
A dripping A/C line in July that saturates ceiling insulation in the attic
Any water event that remains unresolved for more than 24 hours warrants at least a basic mold inspection.
Early Warning Signs: Do You Have Mold After Water Damage?
Mold often develops where you can’t see it—inside walls, behind baseboards, under carpets, and within ceiling cavities. Because hidden mold is so common, you need to rely on early warning signs from your senses and from changes in materials. Many homeowners first suspect mold not from seeing it, but from smelling it or noticing health changes.
Visual clues:
Brown or yellow water stains on ceilings or drywall
Bubbling, peeling, or blistering paint
Warped baseboards or buckled flooring
Dark spots or discoloration along grout lines
Fuzzy or powdery patches on stored items in basements or crawl spaces
Sensory clues:
Persistent musty odor or earthy odor in the same area
Air that feels damp or heavy, especially in enclosed spaces
Increased condensation on windows near previously damaged areas
Health indicators:
New or worsening chronic coughing, sneezing, or sinus congestion
Headaches that occur primarily when you’re in the building
Asthma flare ups or respiratory problems that improve when you leave
Increased allergy symptoms without obvious environmental triggers
Any of these signs appearing within days to weeks after a water incident are a strong reason to schedule a mold inspection rather than waiting.

Hidden Mold: Where Inspectors Often Find Problems
Behind shower walls where grout cracks allow water infiltration
Under laminate or hardwood floors near kitchens and bathrooms
Inside insulation behind exterior walls, especially on north-facing surfaces
Inside HVAC air handlers, air ducts, and return plenums
Around window framing after long-term condensation problems
Cabinets under sinks where slow leaks go unnoticed
Finished basements with prior flooding history (like a storm event from September 2023)
Areas around chimney flashing where roof penetrations fail
Crawl spaces with inadequate vapor barriers and poor ventilation
Ceiling cavities below bathrooms or kitchens with past water damage
A lack of visible mold does not mean your property is mold-free if there has been standing water, wicking in drywall, or recurrent water leak events.
What Happens During a Professional Water Damage and Mold Inspection?
A full water damage and mold inspection follows a systematic process: interviewing the property owner, conducting visual inspection of all affected areas, using specialized equipment to find moisture, and—when needed—collecting samples for laboratory analysis.
The goal is to map the entire moisture-affected area, identify any active mold growth, and determine whether materials can be dried and cleaned or must be removed. Reputable inspectors focus on objective findings and documentation, not on upselling services. A proper inspection report should stand on its own for any restoration contractor to follow.
Initial consultation to understand the water event history
Room-by-room visual assessment of damage
Moisture mapping using meters and thermal imaging
Air and surface sampling when laboratory confirmation is needed
Comprehensive documentation with photos, readings, and recommendations
Step 1: Initial Consultation and History of Water Damage
The inspector begins by asking when the water event occurred—for example, “The pipe burst on January 3, 2024”—how long water was present before cleanup started, what remediation was already attempted, and whether any musty odor or health symptoms have been noticed since.
Previous reports, plumber or roofer invoices, and photos from the incident help target likely problem areas
This history guides the inspector to focus on high-risk zones: the level below the leak, wall cavities adjacent to damaged bathrooms, or rooms at the end of duct runs
Step 2: Visual Inspection of Water Damage and Suspected Mold
Inspector walks through all affected rooms looking for staining, discoloration, warping, and visible mold spots
Close attention to baseboards, trim, lower drywall sections, under-sink areas, and window/door frames
Furniture and stored items may be moved to expose hidden areas
Access panels to crawl spaces or attic hatches opened to examine concealed cavities
Any visible signs of past water intrusion noted and photographed
Step 3: Moisture Mapping and Humidity Checks
Inspectors use a moisture meter on surfaces like drywall, trim, flooring, and subfloors to determine if materials remain damp beyond normal moisture levels. Wood moisture content above 16–20% signals elevated mold risk.
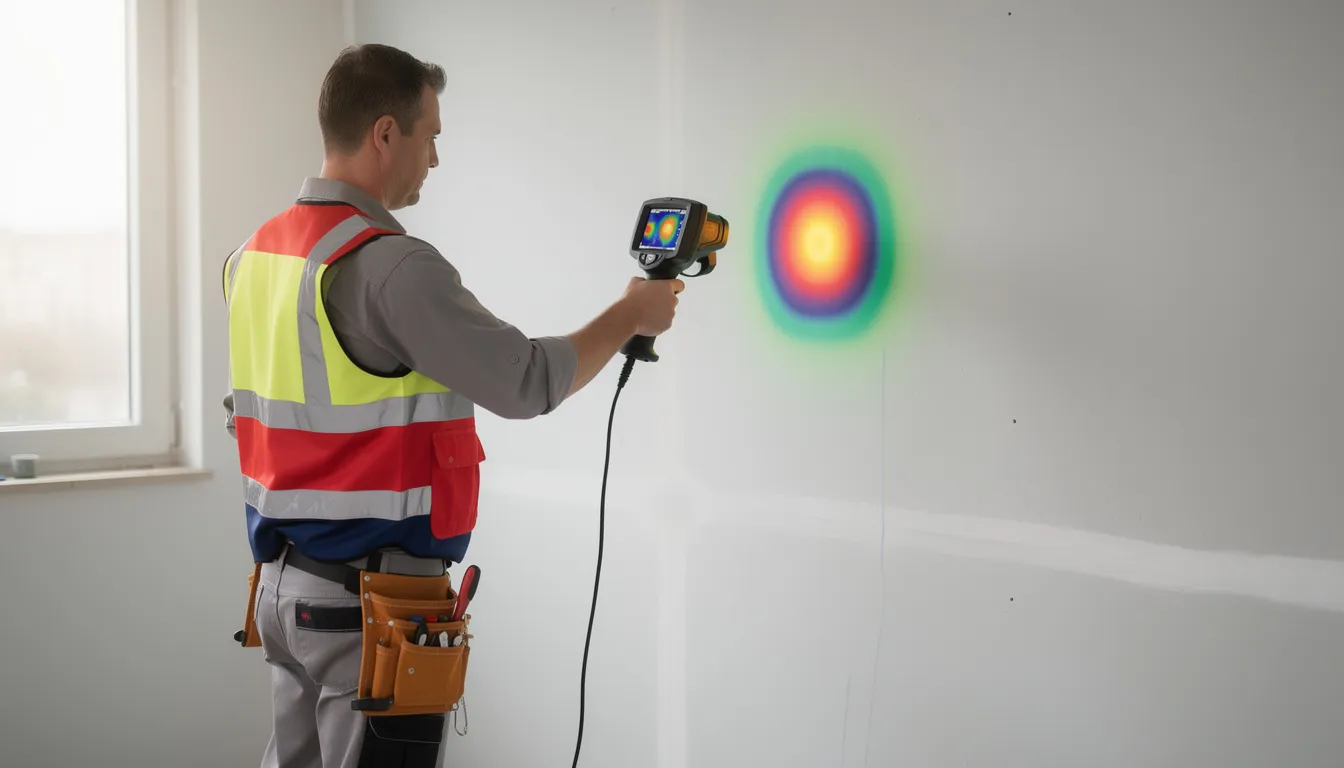
Infrared cameras reveal temperature differentials that indicate hidden moisture—cold, wet areas behind walls or ceilings that look completely normal to the naked eye. This might show a wet corner behind a shower or saturated insulation below a past roof leak.
Relative humidity and temperature measured in various rooms
Humidity levels above 60% indicate conditions that support mold growth
Moisture mapping creates a visual guide of the affected area for remediation planning
Step 4: Mold Testing and Sampling (When Needed)
Not every water damage inspection requires professional mold testing. Sampling is reserved for situations where laboratory confirmation will change the remediation plan or when documentation is required by the client, insurer, or for real estate transactions.
Air samples measure spore concentrations in the breathing zone (normal indoor levels typically under 500 spores/m³)
Surface tape lifts or swab samples collected from suspect mold growth
Cavity samples may be pulled from behind walls in specific circumstances
All samples sent to an independent accredited laboratory
Lab reports identify mold types (including toxic mold like Stachybotrys chartarum) and compare indoor concentrations to outdoor controls
Step 5: Findings, Photos, and Recommendations
The inspector compiles a written report summarizing where moisture was found, what visible mold (if any) is present, and which materials are affected. For example: “Elevated moisture detected 2 feet up the drywall on the north wall of the living room; visible fungal growth on paper backing of drywall.”
Reports include annotated floor plans, photos, and moisture readings
Recommendations for drying, containment, and mold remediation clearly outlined
Urgent safety issues (extensive growth in a child’s bedroom) distinguished from cosmetic damage
Documentation suitable for insurance claims and remediation contractors
DIY Mold Check After Water Damage: What You Can Safely Look For
Homeowners can perform a basic visual and smell check after smaller water events—but any significant mold damage or growth covering more than roughly 10 square feet should involve professionals. DIY methods are for early detection only, not a replacement for formal inspection when conditions are widespread or unclear.
Always wear simple protective gear when checking for mold: an N95 mask, gloves, and eye protection. Never aggressively disturb materials you suspect mold is growing on, as this releases mold spores into the air and can worsen respiratory issues.
Focus on rooms that were recently wet: around a past washing machine leak, below a bathroom that overflowed, or basement areas where water pooled
Look for new stains, swelling, soft spots, or discoloration
Note any dark areas that weren’t present before the water event
If you find obvious growth or strong odors, stop and call an inspector
Simple Steps for a Safe At-Home Check
Start at the known water source and work outward: inspect adjacent walls, ceilings, baseboards, and flooring
Use a bright flashlight at a low angle to spot bubbles, ripples, or surface texture changes
Open cabinets under sinks, closet doors, and HVAC systems panels—note if musty odors intensify
Check areas where air circulation is poor, as mold thrives in stagnant, damp spaces
Do not cut into walls, pull up large flooring sections, or use fans directly on moldy areas
If you find visible mold or smell persistent earthy or musty odors, do not attempt mold cleanup yourself—call a professional
When you suspect mold in hidden areas or growth appears extensive, stop investigating and schedule a professional inspection.
When to Call a Professional Mold Inspector or Remediation Company
Professional help becomes critical when the source of moisture is unclear, growth is extensive, or health concerns are present. DIY approaches have clear limits, and pushing past them can spread contamination or expose your family to toxic mold exposure.
Size-based guidance:
Visible mold patches larger than about 10 square feet
Recurring mold in the same area even after mold removal attempts
Multiple rooms with musty odors or mold issues
Documentation requirements:
Real estate transactions where buyers or lenders require mold inspection reports
Tenant complaints about air quality or health symptoms
Daycare, healthcare, or commercial settings with regulatory requirements
Repeated insurance claims for water damage
Health red flags:
Household members with asthma, mold allergies, or weakened immune systems
Unexplained chronic respiratory symptoms, chronic coughing, or prolonged exposure concerns
Symptoms that improve when occupants leave the building

What to Expect From a Qualified Mold and Water Damage Professional
Trained in inspection protocols, moisture diagnostics, and industry standards (IICRC certification is common)
Able to describe their inspection and remediation process in detail before arriving
Uses containment methods during remediation: plastic barriers, negative air machines with HEPA filtration, and air scrubbers
Provides written scope of work before starting
Documents completed work with photos and detailed notes
Offers post-remediation verification testing by an independent party when requested
Familiar with local building codes and insurance documentation requirements
Experienced with specific loss types (sewage backup in finished basements vs. attic roof leaks)
Preventing Mold After Water Damage: Next Steps and Long-Term Strategies
Even after an inspection and mold cleanup, long-term prevention depends on moisture control, prompt repairs, and periodic checks of past problem areas. Mold problems recur in up to 40% of cases when the underlying moisture source isn’t eliminated—so future growth prevention matters as much as initial remediation.
Remove standing water within hours of any water event
Run dehumidifiers in damp seasons to keep indoor humidity between 30–50%
Fully dry or replace saturated porous materials like carpet, padding, and drywall
Improve airflow in enclosed spaces to prevent mold from finding stagnant, humid pockets
Schedule follow-up checks of previously damaged areas several weeks after repairs, especially during humid periods
Open windows periodically to ventilate, but rely primarily on mechanical ventilation in humid climates
Keep detailed records of all water events: dates, causes, photos, and repair receipts for future inspectors
Practical Moisture Control Tips for Homes and Businesses
Maintain indoor humidity between 30–50% using dehumidifiers in basements, crawl spaces, and chronically damp areas
Inspect plumbing (under sinks, around water heaters, behind washing machines) at least twice yearly
Check roofs around chimneys, skylights, and valleys after major storms
Use exhaust fans vented outdoors in bathrooms, kitchens, laundry rooms, and utility closets
Seal cracks in foundation walls and floors to prevent groundwater seepage
Install or maintain sump pumps in flood-prone basements
Ensure gutters and downspouts direct water at least 4–6 feet away from the foundation
Act fast when you notice even small leaks—delays measured in hours can mean the difference between simple cleanup and full mold remediation
The risk of mold drops dramatically when you prevent mold by controlling moisture before it accumulates.
Don’t Wait: Schedule a Water Damage and Mold Inspection
Mold can begin forming within 24 to 48 hours after water damage. What starts as a simple leak from April or a minor flood from last month can quickly become a costly structural and health problem if left unchecked. The first signs of trouble often linger long after the water itself is gone.
If you’ve experienced any recent leaks, flooding, appliance failures, or unexplained musty odors, arrange a professional water damage and mold inspection as soon as possible.
A prompt inspection confirms whether mold is present
Defines the full extent of the affected area
Identifies hidden moisture that visual checks miss
Creates a clear, documented plan for safe remediation process and long-term prevention
Don’t let water damage turn into mold damage. Act quickly to protect your property, your indoor air quality, and your family’s health.
Latest news