Plumbing and Mold Remediation

Plumbing and Mold Remediation
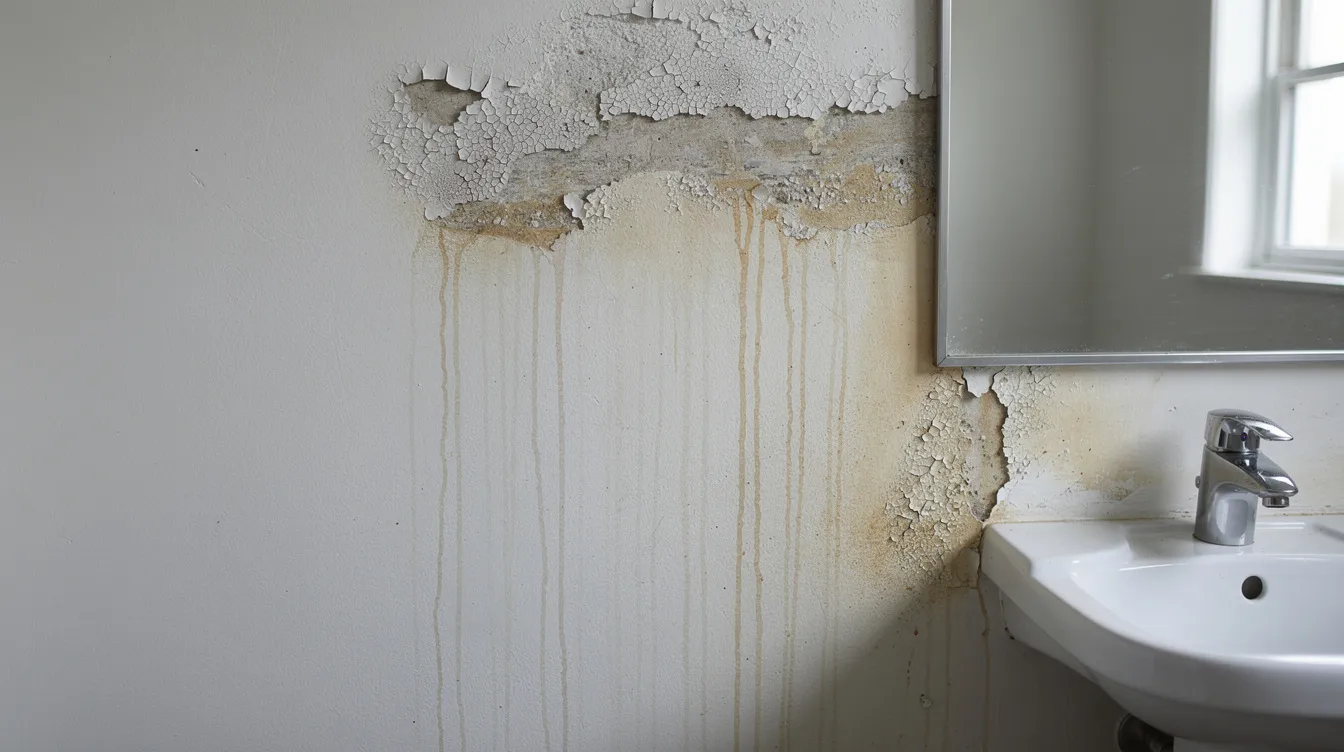
A slow drip behind your bathroom wall might seem harmless, but that hidden moisture can trigger a serious mold problem within just 48 hours. Understanding the connection between plumbing and mold remediation is essential for any homeowner or property manager who wants to protect their investment and maintain healthy indoor air quality.
This guide walks you through identifying plumbing-related mold issues, conducting inspections, making critical repairs, and executing proper cleanup to prevent costly damage. Restoration professionals also handle fire damage cleanup and restoration, demonstrating their expertise in a range of property emergencies.
Introduction to Mold Issues
Mold growth is a widespread concern that can impact any home or business, especially following water damage or plumbing leaks. Even a small amount of moisture can create the perfect environment for mold spores to thrive, quickly turning a minor issue into a significant mold problem.
Addressing mold issues promptly is crucial—not only to prevent further property damage but also to protect the health of everyone in the affected area.
Professional mold remediation services are designed to tackle these challenges head-on. Mold remediation involves more than just cleaning visible mold; it requires the thorough removal of mold spores, careful cleanup of all affected surfaces, and comprehensive restoration work to prevent future mold growth.
Specialists use advanced techniques and equipment, such as HEPA vacuums, air scrubbers, and commercial-grade dehumidifiers, to ensure that mold is effectively removed and indoor air quality is restored.
Mold spores are microscopic and can easily spread throughout a property, especially when they settle into porous materials like drywall, insulation, and carpet. This cross contamination can make mold growth difficult to control without professional intervention.
Regular maintenance, proper ventilation, and acting quickly when signs of moisture or mold appear are essential steps in preventing mold problems from escalating. Left unchecked, mold can cause allergic reactions, respiratory issues, and other health problems, particularly for children, the elderly, and pets.
When mold is suspected, it’s important to consult a mold specialist who can determine the extent of the problem and recommend a tailored remediation plan. This may involve replacing drywall, repairing flooring, repainting, and addressing any underlying plumbing leaks or water damage.
Restoration work not only removes existing mold but also helps safeguard your property against future outbreaks.
Several factors contribute to mold growth, including high humidity, inadequate ventilation, and persistent moisture from plumbing issues. Homeowners and business owners can reduce their risk by scheduling regular inspections, performing timely repairs, and using mold-resistant materials where possible.
Being knowledgeable about the causes and signs of mold—such as musty odors, discoloration, or black spots on surfaces—empowers you to act quickly and prevent widespread damage.
It’s also important to remember that mold can enter your home or business through various means, including clothing, pets, or open windows. Once inside, mold spores can settle and multiply rapidly, especially in areas with poor ventilation or excess moisture.
Staying vigilant and seeking guidance from reputable sources, such as the US EPA, or consulting with experienced professionals, can help you better understand mold issues and the importance of effective remediation.
Ultimately, mold issues demand prompt attention and the expertise of professional mold remediation services. By understanding the factors that contribute to mold growth, taking proactive steps to maintain your property, and seeking professional help when needed, you can ensure a safe, healthy, and mold-free environment for your home or business.
Understanding the Link Between Plumbing Leaks and Mold Growth
Hidden plumbing leaks represent one of the most common triggers for mold problems in homes and small businesses. These leaks often occur in concealed locations—behind drywall, beneath subflooring, or within crawl spaces—where moisture accumulates undetected and creates ideal conditions for fungal growth.
According to EPA research, undetected plumbing moisture accounts for up to 30% of indoor mold incidents in scenarios that don’t involve flooding.
Mold spores are naturally present in indoor air, waiting for the right conditions to germinate. They require only sustained moisture levels above 60% relative humidity, temperatures between 77°F and 86°F, and organic substrates like cellulose in drywall or wood framing.
When a pipe leaks, an overflowing toilet saturates the subfloor, or a water heater fails, mold growth can begin within 24 to 48 hours—even after visible standing water disappears. Residual dampness persists in porous materials, providing the continuous moisture mold colonies need to thrive.
The typical plumbing-related sources of mold are often surprisingly small. Pinhole leaks in copper piping, common in homes with hard water that accelerates corrosion, can release as little as 1-2 gallons per day—enough to saturate insulation and drywall without creating visible puddles.
Failed P-traps under bathroom sinks allow water to evaporate slowly, creating chronic humidity. Cracked PVC drain lines behind showers permit wastewater seepage, while refrigerator icemaker lines with failing fittings drip onto cabinetry floors for months before anyone notices.
Consider this scenario: A homeowner in a 1980s-era home notices a slight musty smell near the kitchen but dismisses it. Six months later, a contractor discovers extensive mold damage behind the refrigerator caused by a pinhole leak in the icemaker supply line.
The repair requires replacing drywall, treating the framing, and completing full mold remediation—all because a minor leak went unnoticed.
Addressing both the plumbing issue and the mold contamination together is crucial. Industry reports from restoration firms indicate that incomplete intervention leads to recurrence rates exceeding 40% within a year.
Without fixing the water source, even the most thorough mold cleanup will fail, potentially causing structural degradation like softened wooden studs alongside health risks from mycotoxin exposure.
Common Signs of Mold Caused by Plumbing Problems
Mold from plumbing failures often hides in walls, ceilings, and cabinets, but it still leaves detectable clues. Recognizing these signs early allows you to act quickly before minor contamination becomes a major restoration project.
Look for these common signs of mold caused by plumbing problems:
Musty odors near sinks or tubs: Frequently the first indicator of a hidden mold problem. These smells come from volatile organic compounds (VOCs) released by actively growing mold species like Stachybotrys chartarum or Aspergillus. If you notice an earthy, damp smell that intensifies when you’re near plumbing fixtures, moisture is likely accumulating somewhere out of sight.
Bubbling or peeling paint: On walls adjacent to plumbing fixtures, this signals that moisture is wicking through the drywall. After mold remediation, painting is often included as part of the restoration process to repair and refresh affected surfaces. The water disrupts the bond between the paint and the surface, causing the finish to delaminate. This symptom appears most often near shower walls, behind toilets, or around bathroom vanities.
Warped baseboards: Swelling and curling at the edges indicate absorbed moisture from below. In bathrooms and kitchens, this often points to slow leaks at supply lines or drain connections that have been releasing water damage over time.
Discolored, crumbling caulk: Around bathtubs and showers, caulk can harbor mold within its porous structure. What starts as surface discoloration eventually penetrates the silicone, creating a visible blackening pattern that signals deeper contamination.
Dark, irregular spots on drywall: Below fixtures like vanities, these indicate staining from migrating mold growth. These spots may appear brown, green, or black and often spread outward from a central moisture source.
Recurring yellowish-brown ceiling stains: Beneath upper-floor bathrooms, these suggest drain leaks.
Persistent dampness inside vanity cabinets: Points to supply line drips.
Moldy smells from under-kitchen-sink areas: Often result from organic debris accumulating in traps.
To check for leaks, turn off all water in the home and check the water meter; if it moves, there is a leak. You can also test for a leak in a toilet by placing a few drops of food coloring in the toilet tank—if the color appears in the bowl, the flush valve is leaking.
Health symptoms can also correlate with these moisture sites. If household members experience worsening allergies, chronic sinusitis, or respiratory coughing that intensifies in bathrooms, laundry rooms, or near mechanical rooms, aerosolized mold spores may be the cause.
CDC data links such exposures to increased asthma exacerbations in 20-30% of sensitive individuals, potentially affecting children, elderly residents, and pets.
Slow or frequently clogging drains compound mold risk by trapping hair, soap scum, and biofilm. Mold metabolizes this organic material, forming slime layers that obstruct water flow and perpetuate moisture conditions favorable to growth.
Inspecting Your Plumbing System for Hidden Moisture and Mold
Homeowners can perform a basic visual inspection to identify obvious moisture problems, but a licensed plumber and certified mold specialist should handle thorough assessments that verify the full extent of contamination and water damage.
Start your inspection on the upper floors, working systematically downward. Use a flashlight to probe under bathroom sinks, looking for damp cabinet floors, corroded P-trap fittings, or condensation beads on uninsulated cold supply lines.
Check toilet bases for rocking instability, which signals wax ring failure—these failed seals can leak 0.5-1 pint per flush, saturating the subfloor with each use. Inspect behind accessible washing machine hoses for seepage stains that indicate deteriorating connections.
In kitchens, examine dishwasher undersides for drip tray overflow and refrigerator lines for kinked copper coils prone to pinhole breaches. Move to basements or crawl spaces and scan for water stains around shutoff valves, fungal growth on joists, or efflorescence—those white mineral deposits on concrete that indicate evaporating pipe leaks.
Professional inspection brings specialized tools that identify problems invisible to the naked eye, and a qualified mold inspector knows how to interpret those findings to guide remediation.
Moisture meters registering above 16% in drywall indicate problematic saturation levels. Thermal imaging cameras detect temperature differentials as small as 1°F, revealing wet zones behind tile or inside walls without destructive testing. Borescopes can thread 10-30 feet into wall voids and ceiling spaces to visualize mold mats or active drips that homeowners would never discover otherwise.
A standard combined plumbing and moisture inspection for a 2,000 square foot single-family home with 2-3 bathrooms typically spans 1-3 hours, costing $300-800 in 2026 market rates.
This professional assessment identifies 70-80% of issues missed by DIY mold cleanup efforts, potentially preventing $5,000 or more in average remediation expenses down the line.

Plumbing Repairs That Prevent Future Mold Problems
Lasting mold remediation is impossible without fixing the underlying water source. When moisture continues to infiltrate building materials, even the most thorough cleanup will fail, and you’ll face the same mold problem again within months.
Toilet wax ring replacement addresses one of the most common bathroom leak sources. These seals fail in approximately 20% of pre-2000 installations due to compression set over time. The repair involves lifting the toilet, scraping away old residue, and reinstalling with modern fiber-reinforced seals that halt subfloor saturation—preventing mold from developing in the plywood layers beneath.
Corroded shutoff valve rebuilds stop drips at their source. Brass valves in copper systems often deteriorate through galvanic action, creating chronic leaks that saturate vanity cabinets. Upgrading to quarter-turn ball valves provides drip-free operation and reduces future failure risk.
Re-piping deteriorated sections dramatically improves system reliability. Galvanized steel piping, common in homes built between 1960 and 1980, develops internal scaling that reduces flow by 50% while fostering pinhole leaks throughout the system. Replacing these sections with PEX or CPVC can reduce leak incidence by 75% according to plumbing engineering studies.
Shower pan re-sealing restores waterproofing in bathrooms where settlement cracks have compromised original barriers. These repairs may require epoxy liners or complete pan replacement, but they prevent chronic moisture from reaching wall framing and flooring below.
Proper ventilation in drain-waste-vent systems also prevents mold conditions. Adequate venting ensures traps retain their water seals without standing residuals in horizontal runs where mold biofilms form.
Undersized or blocked vents cause gurgling, slow drainage, and amplified moisture risk throughout the home, underscoring how closely plumbing and mold remediation are connected in maintaining a healthy property.
Insulation upgrades address condensation-related mold. Foam sleeves on cold-water lines in humid basements can prevent sweating at rates up to 1 pint per hour per pipe. In older homes, wholesale replacement of aging cast iron (which has a 40% failure rate by age 50) or polybutylene piping (UV-degraded and class-action recalled) with cross-linked polyethylene reduces leak probability by 90%, breaking the cycle of recurring wall and ceiling mold that drives thousands of insurance claims annually.
Step-by-Step Mold Remediation After a Plumbing Leak
Once plumbing repairs are completed and the affected area is no longer actively leaking, professional mold remediation can begin safely. Following a systematic process based on EPA and IICRC guidelines ensures contamination is eliminated without spreading mold spores to clean areas of your home or business.
1. Containment and Safety
The remediation team establishes containment using 6-mil plastic sheeting sealed over doorways and static air barriers. Negative air machines with HEPA filters exhaust air at 200-500 CFM, capturing 99.97% of particles as small as 0.3 microns.
Air scrubbers further clean the work zone while HVAC systems in the affected zone are shut down to prevent cross contamination through ductwork. Workers wear appropriate personal protective equipment including respirators, gloves, and coveralls.
2. Removing Wet and Mold-Infested Materials
Porous materials absorb moisture and harbor mold within their structure, making complete removal necessary in most cases. Drywall sections exceeding 16% moisture content or showing visible fungal colonization are cut 12-24 inches beyond the visible demarcation using oscillating tools.
These materials are double-bagged in 6-mil vapor barriers for disposal. Carpet padding and infested insulation are discarded entirely. Salvageable wood framing can often be cleaned and treated rather than replaced.
3. Cleaning and Disinfection
The surfaces that remain undergo thorough decontamination. HEPA vacuums remove loose spores and debris before wet cleaning begins.
Technicians damp wipe affected surfaces and apply EPA-registered antimicrobial solutions—typically hydrogen peroxide or quaternary ammonium compounds at appropriate dilutions—to studs, subfloors, and areas around plumbing penetrations. These treatments neutralize 99.9% of viable spores according to laboratory efficacy testing. Some restoration work may require wire brushing framing to achieve clean surfaces suitable for reconstruction.
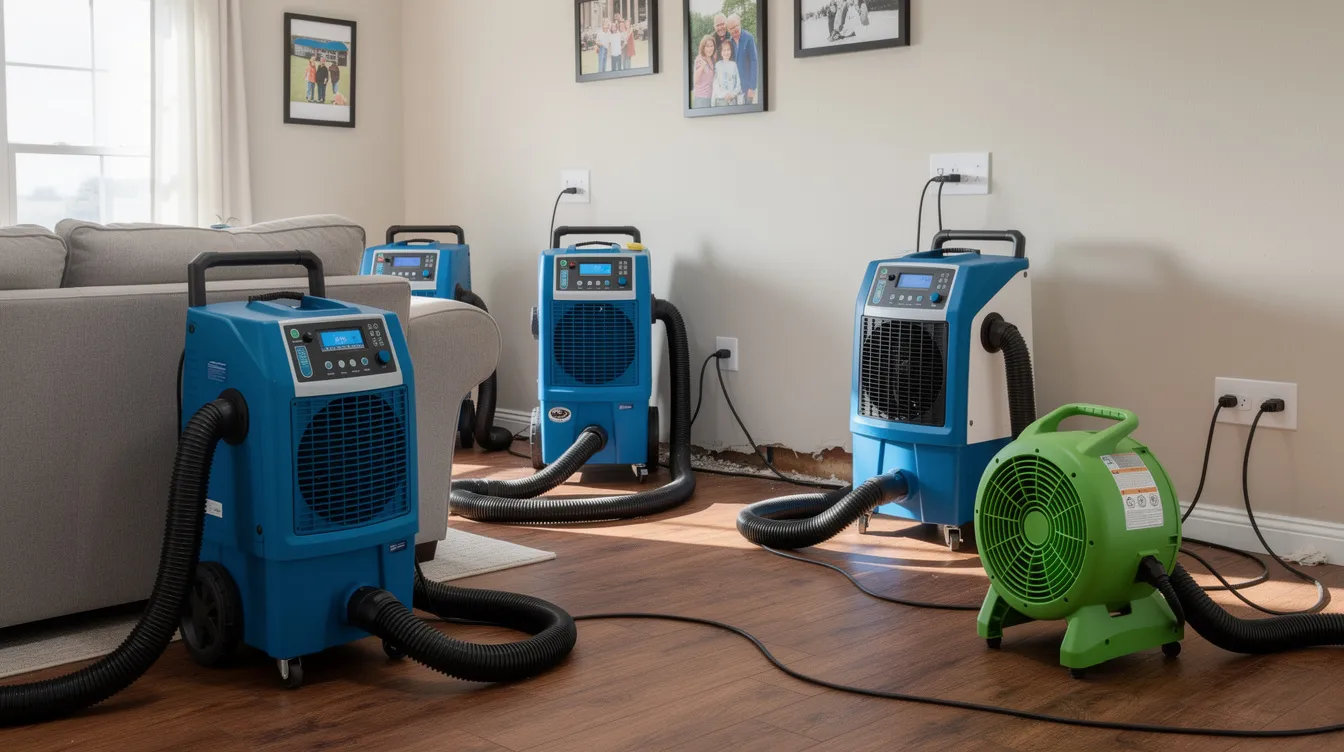
4. Drying and Dehumidification
Commercial-grade dehumidifiers (LGR units pulling 70-120 pints per day) and axial air movers generating 3,000 CFM turbulence bring moisture levels back to normal.
The drying phase typically requires 24-72 hours for an average bathroom leak scenario, with technicians monitoring readings hourly to achieve target moisture content below 12% without over-drying that might crack finishes.
5. Post-Remediation Verification
Before closing walls and completing repairs, verification confirms remediation success. This includes visual inspection of all treated surfaces, moisture meter readings showing levels at or below 15% equilibrium moisture content, and optional third-party air cassette sampling as part of a formal mold remediation clearance test.
Successful projects typically show less than 500 mold spores per cubic meter, confirming the space is ready for reconstruction. This verification step protects both property owners and remediation companies by documenting successful mold cleanup.
Costs, Timelines, and When to Call Professionals
Mold remediation costs can vary widely based on the size of the affected area and local labor rates.
Costs for plumbing-related mold remediation services in 2026 vary significantly based on several factors: where the leak occurred, the size of the affected area, and how long the leak went unnoticed before discovery.
For small, localized mold damage from a minor under-sink leak affecting less than 10 square feet, expect costs ranging from $500 to $2,500. This typically covers plumber diagnostics ($150-400), material removal, cleaning, and drying.
Moderate damage from a bathroom shower pan failure affecting 20-50 square feet generally runs $3,000-7,000, including tile demolition and rebuild work. Extensive basement supply line breaches contaminating more than 100 square feet can escalate to $10,000-25,000 or more, requiring structural framing treatment, extended dehumidification, and complete restoration. Costs for mold remediation may be lower if the affected area is already dried out, as this reduces the need for extensive containment.
Timelines correlate with project scope. Small jobs typically wrap in 1-3 days, with Day 1 focused on source repair, containment, and removal, and Days 2-3 dedicated to cleaning, drying, and verification.
Larger projects involving significant water damage may span 1-2 weeks when extensive demolition, thorough drying periods, and complete rebuilds are necessary.
Local and state regulations in more than 40 states mandate licensed remediation for mold growth exceeding 10 square feet. Insurance carriers typically require pre- and post-remediation photos, psychrometric charts documenting drying progress, and IICRC-compliant reports before processing claims—which average approximately $4,200 in payouts, aligning with the typical price of mold remediation based on contamination size and complexity.
Know when to call a specialist. Professional intervention is essential when mold covers more than 10 square feet, when repeated leaks occur from the same plumbing run, when contamination appears in HVAC closets risking system-wide spore dispersal, or when musty odors persist even after DIY cleaning attempts.
All professionals in mold remediation should be trained and certified to ensure compliance with industry standards. Amateur remediation efforts often spread mold spores tenfold according to microbial studies, turning manageable problems into property-wide contamination, so understanding who to call for mold removal is critical. Emergency mold remediation services are available 24/7 for rapid response to mold problems.
Homeowners should obtain at least two written estimates from remediation services verified through organizations like NORMI or RIA. Confirm that any company follows IICRC standards and coordinates directly with licensed plumbers, and consider engaging a certified mold hygienist for your home when you need detailed inspections or documentation.
This knowledge helps ensure you’re working with knowledgeable, courteous professionals who understand both the plumbing and mold aspects of your service needs.
Timely plumbing repairs combined with proper remediation techniques can restore normal indoor air quality and protect your property value. The key is recognizing signs early, addressing moisture at its source, and engaging qualified professionals who can perform accurate mold testing and inspection and deliver thorough, documented results.
Whether you’re dealing with a small bathroom leak or extensive flooding damage requiring complete restoration work, including painting and rebuilding, understanding the process helps you make informed decisions and protect your home, your customers if you’re a business owner, and everyone who visits your property. After restoration, it’s important to run exhaust fans in bathrooms and kitchens during use and for 20–30 minutes after to manage steam and prevent mold growth.
Don’t let a minor leak become a major electrical, structural, or health hazard. If you suspect hidden moisture or notice early signs of black mold covered in this guide, contact a licensed plumber and certified mold remediation professional for an inspection and discuss potential mold testing and removal costs upfront.
Taking action now prevents the kind of extensive mold damage that affects clothing, flooring, windows, and every surface in the affected zone—saving you thousands in repairs and protecting the health of everyone under your roof.
For more information on flood cleanup, indoor air quality, and mold prevention, visit our additional resources and guides.
Latest news